How To Remove A Radiator
Any home Central Heating system can become complicated and something that most people don’t want to mess with if they do not know what they are dealing with!
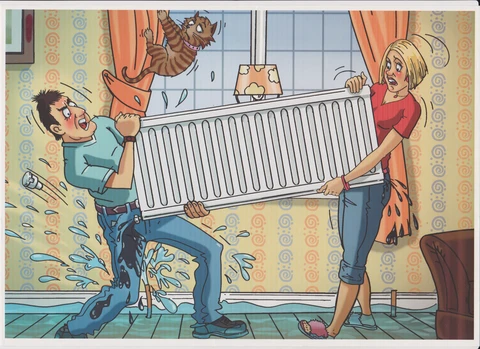
But at some point, you may find yourself in a position where you have no choice but to remove a radiator and the most common reason for this is when it comes to decorating behind!
One thing that is also ignored is the amount of dust that has accumulated behind the radiator over time too!
See Blog – The Importance of Cleaning Radiators
See Blog – How Much Dust Does A Radiator Give Off
See Blog - Do Radiators Circulate Allergens
If you are painting your walls or wallpapering you will have to remove the radiator in order to decorate behind, or if you are giving your house a full spring clean it is recommended that you clean behind the radiators too!
See Blog – How To Remove A Radiator When Painting a Wall
See Blog - How To Wallpaper Behind Radiators
This may not be a job for you if you're not a DIY enthusiast, so in most cases, we recommend that you seek the assistance from a local plumber who has the expertise in draining down the system, but this can become quite costly!
If you are going to attempt to Do-It-Yourself be aware that just one mistake could have financial implications if you don’t know what you are doing!
Let’s take you through a process if you have not fitted the Rotarad kits to your radiators!
Tools Required if Doing- It- Yourself
- Radiator bleed key.
- Adjustable spanner;
- A pair of adjustable grips;
- Towels and a sponge.
- Bucket or small bowl
Check Type of Heating System
If you are unsure about the exact type of your system, look for a little dial on the front of your boiler, which should be located somewhere in your loft or in your airing cupboard.
Make sure you make a note of where the dial is pointing because once you have finished the job and you put your radiator back on the wall, you will need to depressurize the system, and also you may need to add some inhibitor.
If your tank is in the loft, you won’t need to worry about remembering where the system pressure is.
Steps to Remove the Radiator from the Wall
Now you have gathered all your tools together and you have checked the type of heating system you have; you are now ready to proceed with removing the radiator from the wall, or are you?
1. Turn off the heat and allow the radiator to cool down completely
2. Shut off the lockshield valve which is normally on the left-hand side of the radiator by removing the cap and with an adjustable spanner turn the valve clockwise until it stops. Remember do not tighten too tight and make a note of how many turns so you can turn it on the same amount when you have finished.
3. Then move to the right-hand side of the radiator to the manual control valve and close it by turning it clockwise
4. Put some towels or old sheets down around the right-hand side of the manual control valve and bowl ready to catch the water. (beware the water may be very dirty)
5. Take the bleed valve key and use it on the bleed valve which is usually on the top right and turn counterclockwise slowly letting all the water out.
6. With both spanners close the manual valve of the right to keep it from moving and with the other spanner close off the nut that connects the manual valve to the radiator, then loosen it by turning it anti-clockwise making sure that you have a bowl ready to catch the water.
7. Undo the lockshield valve on the left, in the same way, using both spanners again
8. Now you are ready to lift the radiator off its brackets then empty the rest of the water, taking extra care not to spill onto the floor as the water can be very dirty which could stain your carpets or flooring!
Now you have gone through this long process you are now ready to decorate or clean behind the radiator, once completed you then have the task of putting your radiator back onto the wall!
This may take you a few hours or you could be spending a whole day on just one radiator before you even start the process of decorating or cleaning behind your radiator!
Putting the radiator back on the wall!
- Put the radiator back onto brackets making sure the valves are aligned
- Tighten the nuts that connect both valves to the radiator
- Take the bleed valve key and close the bleed valve by turning clockwise
- Turn the lockshield valve the same amount of turns back the opposite way that you made note of before
- Open control valve on the right-hand side by turning anti-clockwise to fill up
- Finally, use the key on the bleed valve to let the air out while it is filling up
So, there you have it your whole day could be just spent taking one radiator off just to decorate or clean behind.
If you decide to get a plumber out there could be a cost for them to come out and take the radiator off the wall and then to put it back on!
See blog – Draining Down The Radiator -V- Rotarad Kits
How Rotarad can make it easy!
There is an option which can allow you instant access without the need to remove the radiators.
No Tools Required – Instant Access - No more draining down system once fitted!
Picture 1 – Release the radiator from the wall retaining brackets.
Picture 2 – Shows the radiator being supported at 45 Degrees by 2 safety wires.
Picture 3 – Shows lowering the radiator to floor level after releasing the safety wires.
Picture 4 – Shows the radiator lowered to floor level which allows instant access.
Conclusion
Once you have installed the Rotarad kits this can take away the stress of decorating and cleaning behind your radiator.
It can also prevent the shock of what dust accumulates behind a radiator without no access.

Having full access also for periodic cleaning can prevent such build-ups of dust and fibres by allowing you access to use your filtered vacuum cleaners, plus if you are also decorating behind your radiators it saves you the hassle of having to drain down your heating system which could become time-consuming and costly!